
Planted Aquarium setup cost in India
Hi guys, my name is Jatin. I was born in Delhi, and for the last two years, I have been living in Jaipur.
During these last two years, planted aquariums have become the only hobby I have really pursued in my 40 years of life.
After creating more than 20 aquariums, all planted, I think I now have a pretty good idea of how to calculate the cost of setting up a planted aquarium in India.
- Cost of Glass Aquarium
- Base for your Glass Aquarium
- Substrate for a Planted Aquarium
- Hardscape, rocks, driftwood or something else
- Aquarium Plants
- Aquarium Light
- Aquarium Filter
- Aquarium heater
- Water Change
- Total Planted Tank Setup Cost in 2026
So, let’s start.
1. Cost of Glass Aquarium
Actually, my first planted aquarium was in a plastic container, which was around 18 inches in length, 14 inches in width, and somewhere around 9 inches in height.
Here it is, a picture from 2024
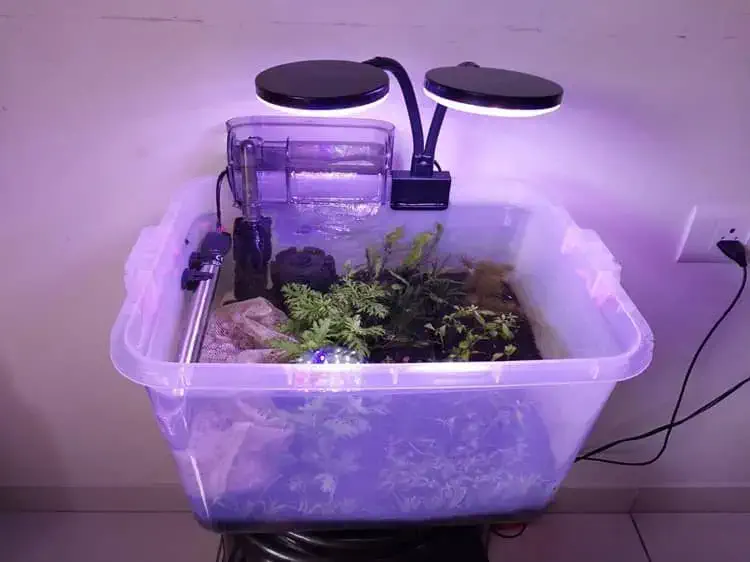
At that time, it cost me around ₹400 to ₹500. Nowadays, you can get something similar for around ₹600 to ₹700, although you can also find cheaper options.
That plastic container is still with me. It’s a bit transparent, and I sometimes use it as a hospital tank.
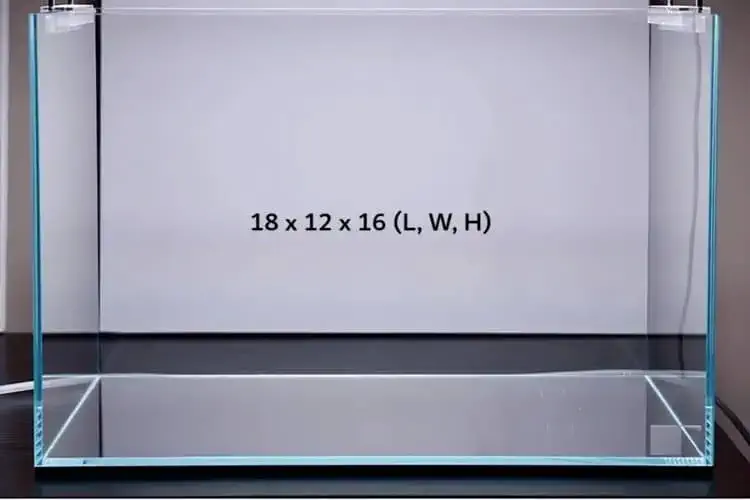
But I would not suggest you buy a plastic container. Instead, I would suggest going for a tank size of 18 inches in length, 12 inches in width, and 15 inches in height.
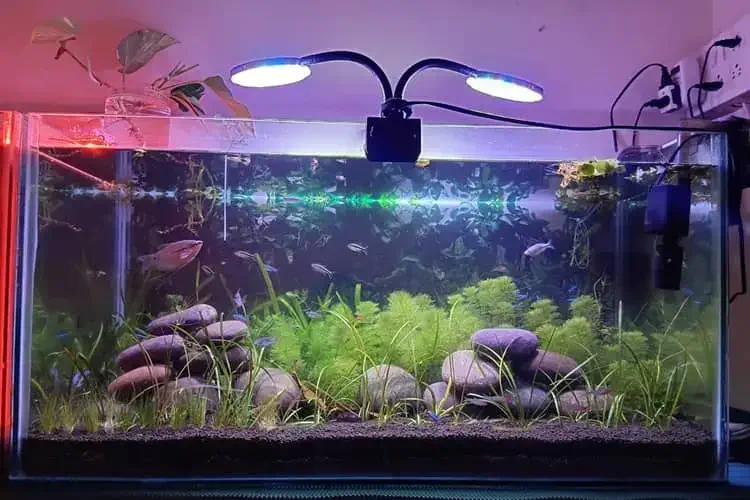
Here is one of my 18 inches length, 12 inch width and 15 inch high planted tank.
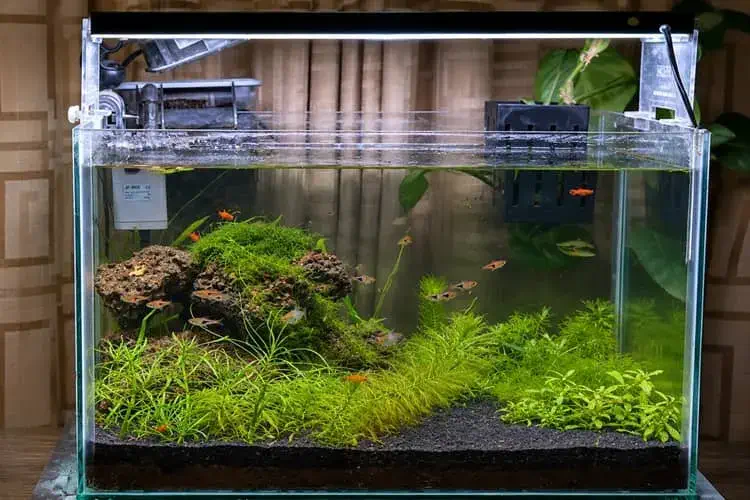
I know it’s not a very common size. I actually started with an 18 × 12 × 12-inch tank, but I feel the real joy comes with a little extra height.
For this size aquarium, you can easily get one made at a local aquarium shop in your city. You can also approach someone who cuts and sells glass; they can assemble the aquarium using silicone for around ₹1,000 to ₹1,200.
If 6 mm glass is available, that’s good, but 5 mm glass would also work. You can even go for 8 mm glass, but it’s not really required for this size.
And if you want something more attractive, you can go with low-iron glass. That would cost you around ₹2,000.
That’s what I did. I paid ₹2,000 for my first aquarium, which was 18 × 12 × 12 inches and made with 8 mm glass.
I eventually sold it after one year at a loss because, by then, I wanted to move to bigger aquariums.
Here is a photo of that 8 mm, extra clear planted aquarium, more like my test planted aquarium.
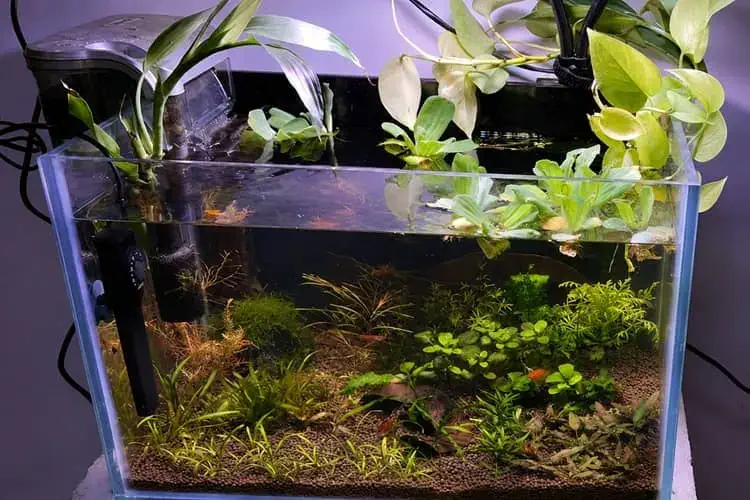
But if you are starting your planted aquarium journey, I think an 18 × 12 × 15-inch glass tank is a perfect size to enjoy the planted aquarium hobby and make your first planted tank.
2. Base for your Glass Aquarium
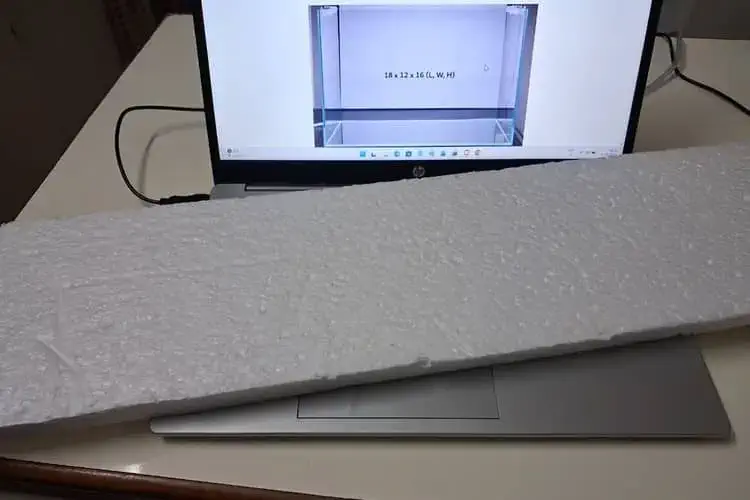
This is actually something I learned when I bought my first aquarium table. It was an iron stand, which I bought from a local shop in Jaipur, Donor Aquarists.
The shop staff told me that you should always put something like a half-inch thermocol sheet underneath the aquarium. This helps protect the aquarium if there is any unevenness in the table or stand.
So, I suggest the same to you.
For around ₹ 40–₹ 50, you can buy a 3 × 1.5 feet thermocol sheet, around half an inch to one inch thick, and simply cut it according to the size of your aquarium.
The important thing is to make sure the thermocol is the same size as the base of your aquarium and use it underneath as a cushion.
If you want something more classy and long-lasting, aquarium mats are also available. But believe me, they can be quite expensive. So a substitute is 4 mm yoga mat.

These yoga mats are usually available in sizes such as 6 × 2 feet or 6 × 3 feet. What I do is cut the yoga mat using a cutter and an inch tape, and I can easily get 2 pieces of 18 × 12 inches from it, making my aquarium mat thickness of 8 mm.
But when you are starting out, you can simply use thermocol. It is inexpensive, easily available, and does the job perfectly.
3. Substrate for a Planted Aquarium
Substrate is very important for a planted aquarium, and sadly, it is one of the most controversial topics, next to aquarium lights.
Aquarium Soil
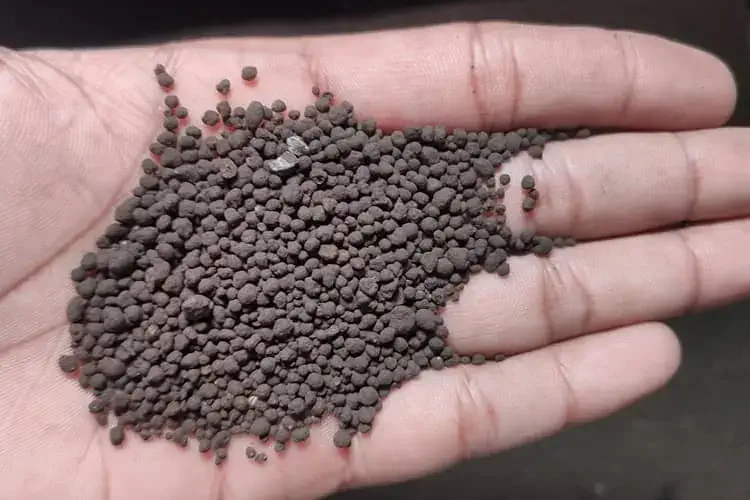
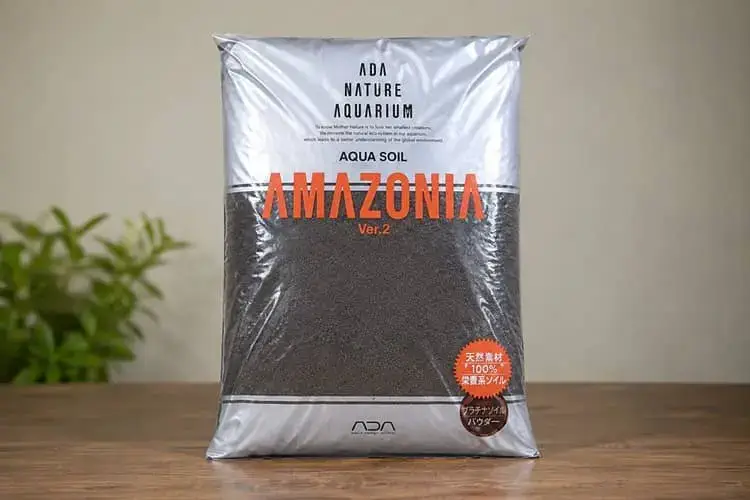
Whenever you search on YouTube for substrate for a planted aquarium, you will always see planted aquarium soil companies popping up, like ADA Amazonia Version 2, Tropica, and so on.
These aquarium substrates are generally sold by liter, and they can cost around ₹ 270 per litre, or sometimes around ₹ 900 for a smaller pack of 3 liter.
For an 18-inch × 12-inch aquarium, you will need around 4 to 5 liters of substrate. Let’s say we go with 5 liters. So, it can easily cost you somewhere around ₹ 1,500 to ₹ 2,000.
You can still get some cheaper options, but again, if you are going with aquarium soil, ADA and Tropica are the two golden-standard companies, according to me.
But there are other ways.
When I started, I also used ADA and Tropica, and personally, I was not fully satisfied with them. I will create a separate blog on why, according to me, you should skip aquarium soil.
A Cheaper Option: Garden Soil Method

For an 18-inch × 12-inch tank, instead of spending ₹1,500–₹2,000 on aquarium soil, you can create your own planted aquarium substrate using three basic things.
The first is red soil. You can get it online from Amazon or Blinkit. It is available at around ₹ 300–₹ 350 for 5 kilos.
The second is compost. You can get it online for around ₹ 100 per kilo, or from a local nursery for around ₹ 50 per kilo, or sometimes even cheaper. But make sure you go for a good, safe product.
The third thing is river sand. We will use river sand for capping the soil because we don’t want the compost and red soil mixture to dissolve into the aquarium water. We will cap it with around 1 to 2 inches of sand.
How Much Red Soil and Compost?
For an 18-inch × 12-inch aquarium, you can use approximately:
- 1.5 kg red soil
- 300 grams compost
- 1 kg river sand for mixing
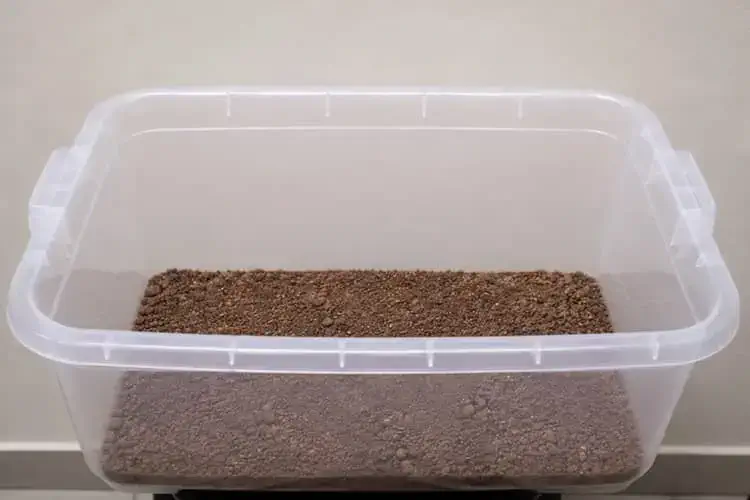
You need to mix the red soil, compost, and around 1 kg of sand properly. Yes, the sand will also be mixed with the soil. After that, we will use additional river sand separately for the top capping.
How Much Sand for Capping?
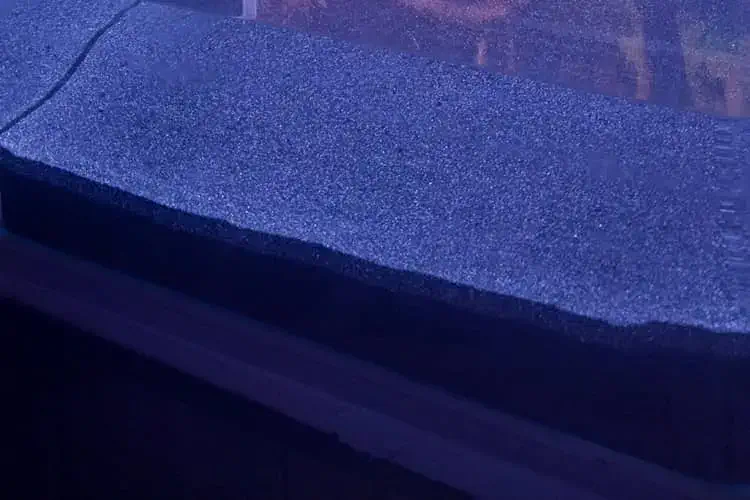
For an 18 × 12-inch aquarium, you can easily use around 10 to 12 kilos of sand for the sand bed and capping.
So, overall, you may use around 14 to 15 kilos of sand, depending on the depth you want. If you buy it online, you can get this quantity of sand for around ₹150–₹300.
The red soil and compost together will cost you around ₹150–₹200. So, the total cost of this entire substrate setup should be under ₹500.
Compare that with ₹1,500–₹2,000 for aquarium soil.
Why I Prefer This Method
The best part is that this type of substrate can last longer.
I mean, this substrate can easily provide nutrients for 3 years or more, whereas aquarium soil can become depleted after around 1.5 to 2 years.
After 1.5 years, or even after 3 years, you can rejuvenate the soil.
I will share that in a separate vlog, where I will explain how to rejuvenate the substrate after 1.5 years and after 3 years. That will be a separate topic.
If You Are Using Aquarium Soil
If you are going with aquarium soil, it is very simple. Just add the aquarium soil into your tank and create a slope. Keep around 1 inch in the front and 2 inches in the back.
This slope will make the planted aquarium look much nicer than having a completely flat substrate.
If You Are Using the Soil + Sand Method
If you are going with the red soil, compost, and sand mixture, first add your soil mixture into the aquarium.
Create a slope. Keep less than half an inch of the soil mixture in the front and around 1.5 inches in the back. Then add some water using a sprayer.
You can also simply throw a little water into the tank, but make sure you don’t disturb the soil mixture.
The idea is just to make the soil damp. Leave it for around 2–3 hours. After that, add your river sand capping on top. Keep around 1 inch of sand in the front and 2 inches in the back.
And that’s it. Now you have prepared a sand-capped substrate bed for your planted aquarium.
4. Hardscape, rocks, driftwood or something else
Well, I will say that if you are setting up your first planted aquarium, you can completely skip hardscape and just add plants, which is the next point.
But I will really say that this is something which I missed in my first few tanks, and I would suggest you add something cheap to give your aquarium some structure.
So 1st option which I will suggest is River Rocks. These are the cheapest hardscape available in aquarium hobby.
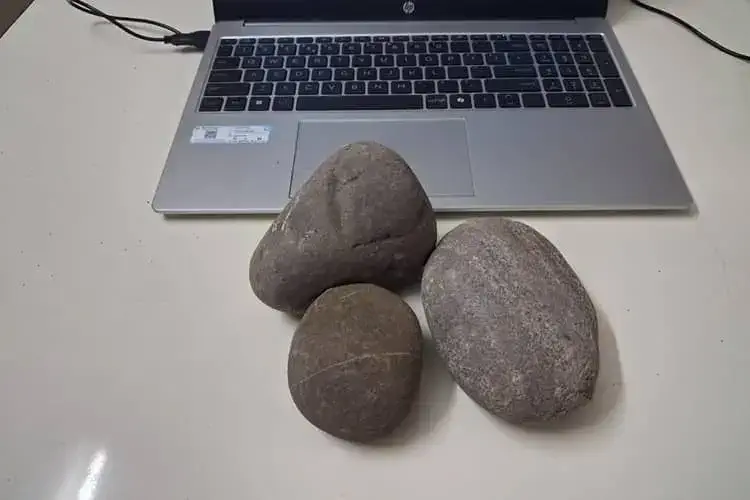
They come in round & oval-shaped, 3 to 5 inches in size, some even bigger
You can get them for around ₹ 50–₹ 60 per kilo from a local store. Online, they are usually sold at a higher price.
In Jaipur, I also got lava rock for around ₹ 100 per kilo, which I believe is a bit cheaper than what you normally find online.
Another option is driftwood.
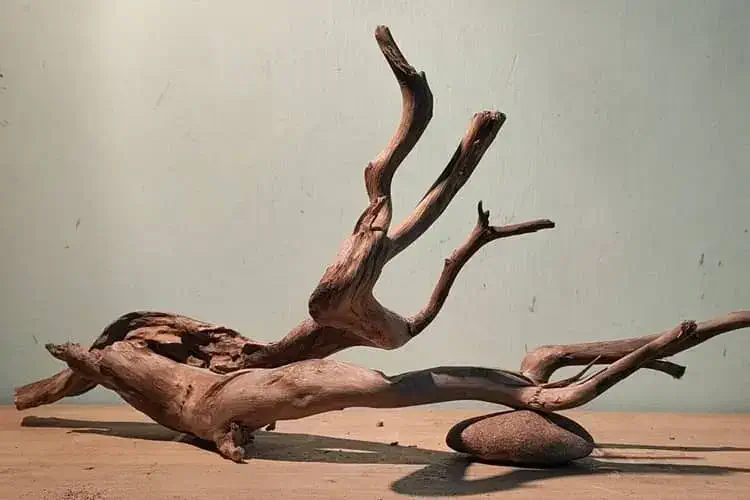
From a local aquarium store, you can get a piece of driftwood around one foot long, or 2-3 smaller ones for ₹ 200–₹ 300.
If you want a bigger piece in the future, driftwood is generally sold according to weight. A common rate is around ₹ 800-1,000 per kilo, although it can vary depending on the type and shape of the wood.
Or skip Hardscape Completely
As I told you, if this is your first planted setup, you can also create a plants only tank. In the planted aquarium hobby, this style is commonly known as a Dutch-style aquarium.
In a Dutch-style aquarium tank there is no hardscape and all focus is mainly on the plants. So, it’s completely up to you.
Other Decorative Options
You can also find aquarium-made decorations, such as a sunken ship, mermaid, or other ornaments.
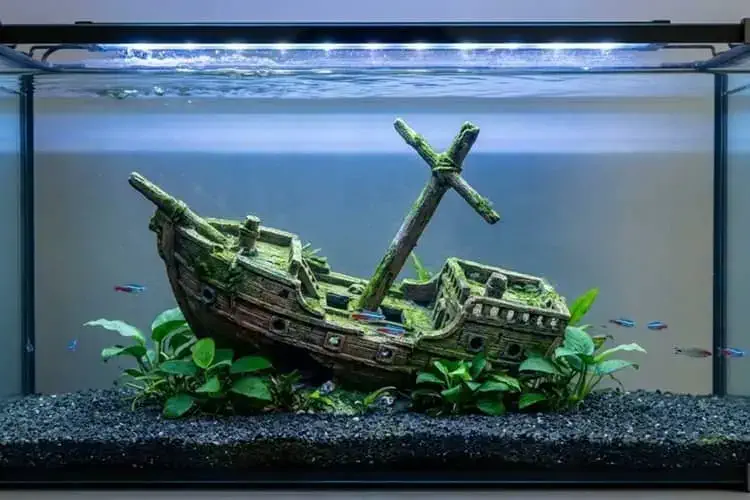
Some people also use religious statues or figures as aquarium decorations. Personally, I prefer not to use religious figures in an aquarium because religious beliefs and symbols deserve to be treated with respect and kept separate from aquarium decoration.
So, for your first planted aquarium, I would keep it simple: some river rocks, a small piece of driftwood, or even no hardscape at all.
5. Aquarium Plants
And now, the most fun part — aquarium plants.
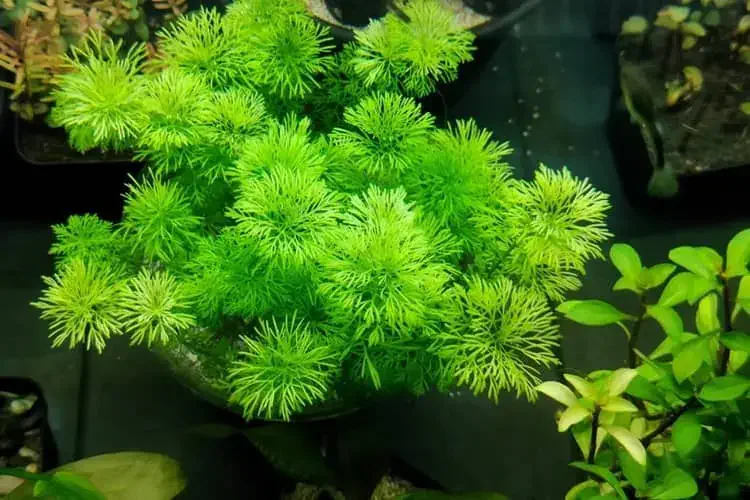
I have personally tried more than three dozen different plants across my 20 tanks, so I have learned quite a lot about them.
If you are building your first planted tank, I always suggest going with low tech plants. What does low-tech mean?
Plants that don’t require strong light, CO2, liquid fertilizers, temperature control. root tabs etc, or Special care. All about these things in a separate blog.
So the best Low Tech Plants to buy for your planted tank setup
For beginners, I would suggest:
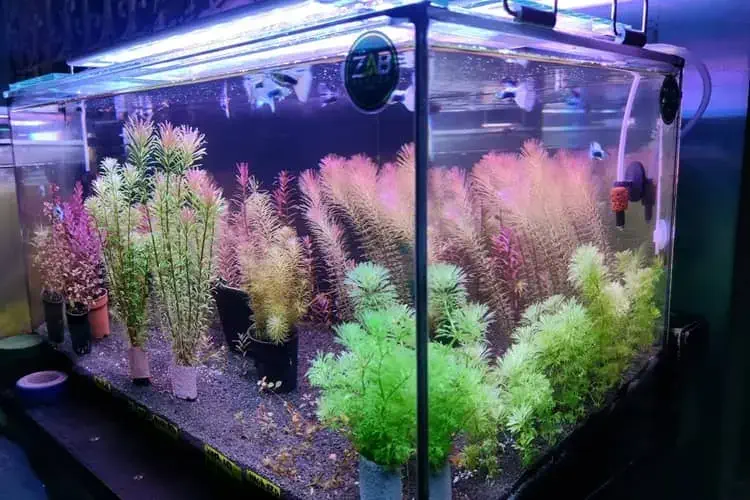
- Vallisneria Gigantea (Tall)
- Aponogeton Crispus (Tall)
- Limnophila Sessiliflora (Tall)
- Dwarf Sagittaria (small)
- Giant Sagittaria (Medium)
- Cryptocoryne Wendtii Tropica, Green or Brown (Medium)
- Cryptocoryne Parva (small)
- Cyptocoryne Spiralis (Tall)
- Hygrophila Difformis (Medium-tall size)
- Hygrophila Polysperma (Medium size)
- Hygrophila Polysperma Rosanervig (Medium size)
- Hygrophila Angustifolia (Tall)
- Water Sprite (Ceratopteris thalictroides) (Tall)
- Bacopa Caroliniana (Medium size)
- Ludwigia Repens (Medium size)
- Foxtail & Guppy Grass
- Small Amazon Swords like Echinodorus Major (Medium size)
- Rotala Rotundifolia Green (Medium size)
- Pogostemon Octopus (Tall)
- Parrot Feather (Tall)
Tall means that its best to place them in backside of the tank, medium means in midground of the tank and small means to place then in front of the tank, also known as carpet plants.
That’s it. I think I have already given you a lot of plant names.
If you want, I can easily give you my top 25 low-tech plants, but that’s a separate topic for another blog.
So how to choose the right plants for your 1st setup?
For your first tank, I always suggest making your plant list in a jungle style. What do I mean by jungle style?
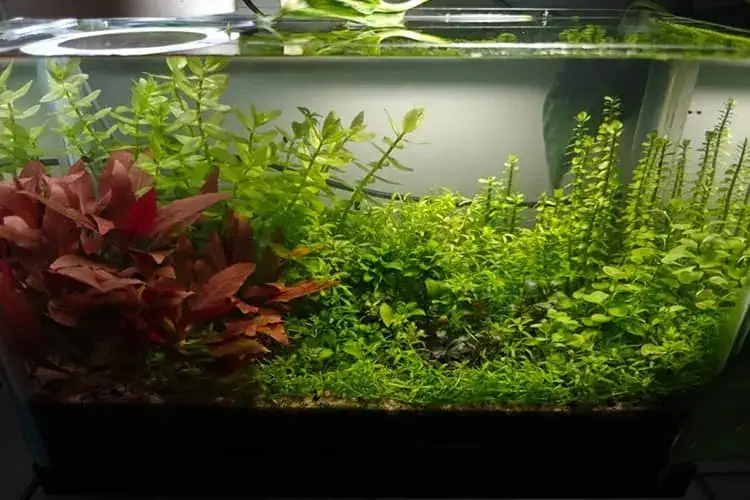
Put some Vallisneria in the back, some Rotala in the back & middle, Cryptocoryne in the middle and front, and Sagittaria in front.
Put Limnophila Sessiliflora anywhere because this plant is magic. It can grow almost anywhere. Best in background and midground.
And if you still have some empty space, just buy some more plants and add them there.
You can even simply throw Foxtail and Guppy Grass into the aquarium. They don’t even need to be planted in the soil.
How to Plant Aquarium Plants?
This is also something you need to learn.
Apart from Guppy Grass and Foxtail, which you can simply put into the water, you mainly need to understand two types of plants:
Stem plants and rosette plants.
Plants like Rotala, Limnophila Sessiliflora, Pogostemon Octopus and similar plants are stem plants.
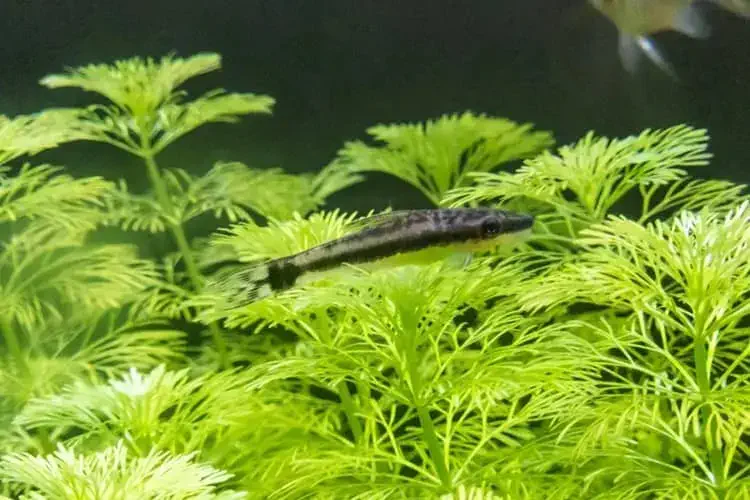
When you order them online, from sites like Fins and Flora or Bunnycart, they will usually send you stems of around 3–4 inches.
You can use a small steel tweezer from a hardware store, or buy a proper 9 inch planted-tank tweezers.
Take one stem with the tweezer and push it into the substrate. If the plant is 4 inches long, put around 2 inches under the substrate.
That’s basically how you plant stem plants like Rotala and Pogostemon Octopus.
For Vallisneria and Cryptocoryne, (Rosette Plant) you don’t need to bury the plant deeply.
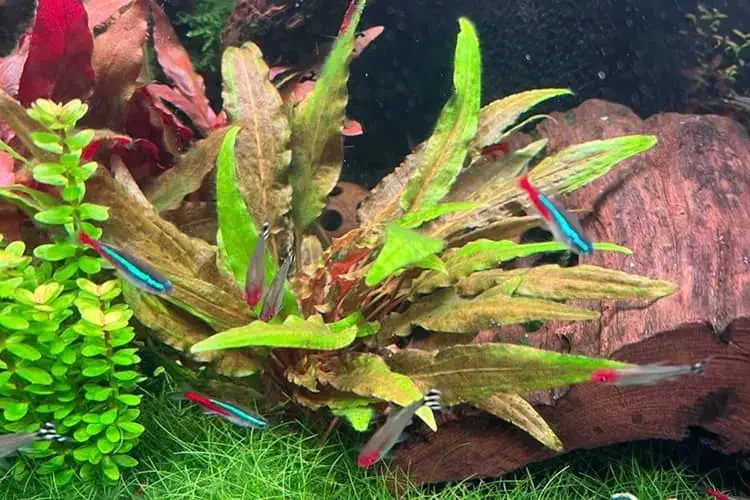
These plants have a rosette from which the leaves grow upward and the roots grow downward.
You just need to make sure that the rosette is at or slightly above the substrate. Even if only a very small part is visible, that’s okay.
If you completely bury the rosette, for example 1-2 inches under the sand, there is a good chance that the plant may melt.
Now, I know if you have never planted an aquarium before, you may be thinking, “What is all this? This sounds very technical.”
Believe me, it is not. Just search on YouTube for “how to plant Vallisneria in a planted tank” or “how to plant Cryptocoryne in a planted tank.”
It is difficult to understand just by reading or listening, but once you see it, it is very easy to implement.
What Are High-Tech Plants?
Let me quickly mention high tech plants.
These are plants that generally require strong light, CO2, better temperature control, and more attention. For example:
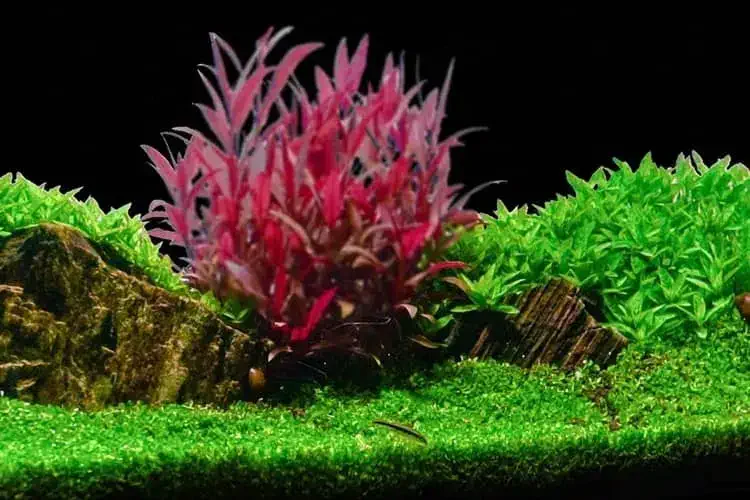
- Monte Carlo
- HC Cuba
- Glossostigma
- Rotala HRA
- Pogostemon Deccan
- And many more
But if this is your first planted tank, go with low-tech plants. You will save money, reduce maintenance, and most importantly, you will enjoy the hobby much more.
6. Aquarium Light
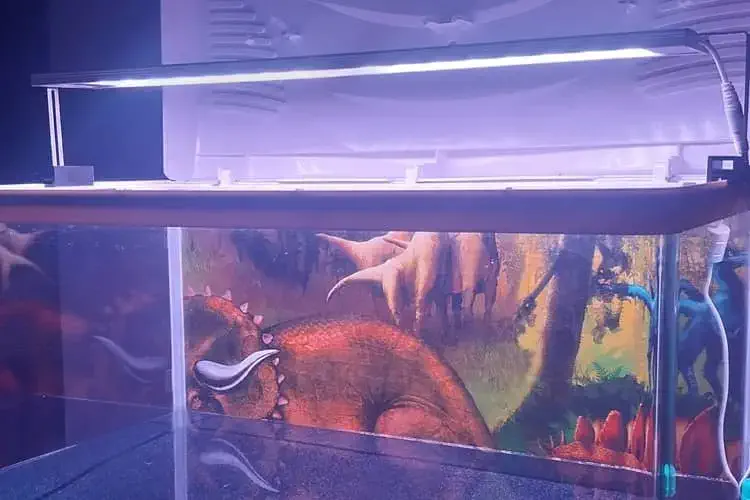
So now, you have the tank, you have the soil substrate or aqua soil, you have some hardscape or not, and we have added your favorite plants, which you must have seen online & loved the photos of. Now what?
Fill the tank with water: For an 18 × 12 × 15-inch tank, after adding the substrate and hardscape, you will easily have around 45–50 litres of water in the tank, even while keeping the top 1 inch empty. And honestly, it looks nice.
And now, let’s have some light. But….
Do You Really Need an Aquarium Light?
Technically, you can skip an aquarium light by keeping the Planted Aquarium somewhere in the room, with a good amount of indirect sunlight.
The plants can grow with that. But I don’t suggest it. The problem is that sunlight changes with the weather.
In winter, the sunlight coming into your room may be fine, with the room temperature around 15–20°C.
But in summer, that same sunlight can push your aquarium temperature to 35–40°C.
And after around 32°C, many aquarium plants (if not all) start struggling and melt. So, I suggest getting an aquarium light.
Cheap Aquarium Lights
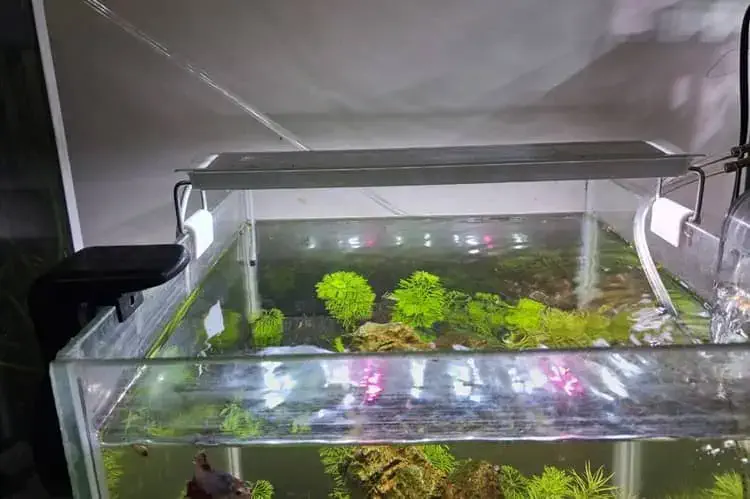
For an 18 × 12-inch aquarium, you can easily find small aquarium lights that fit the tank.
If you search online, you will find cheap lights for around ₹ 500. There are also branded entry level options from brands like SOBO and Bluepet, generally around ₹ 700–800.
These lights are usually around 15–20 watts and are made for planted aquariums.
Slightly Better Options
If you increase your budget a little, you can look at something like the NeoHelios XP, Fireglow WRGB planted light.
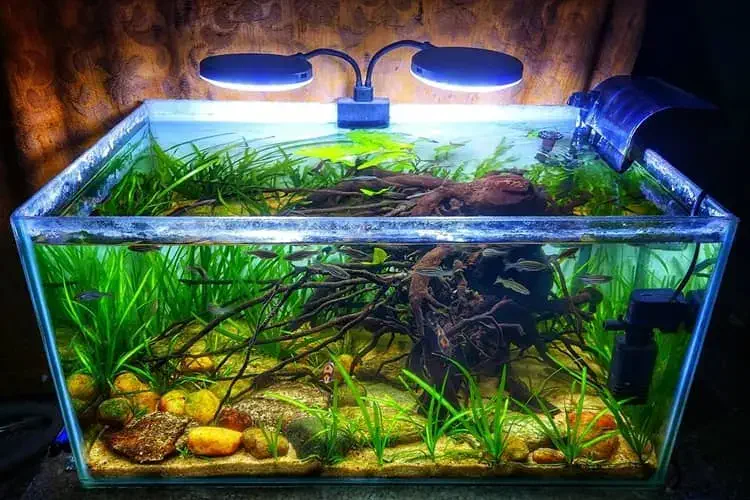
For this setup, it can cost around ₹ 2,000-2,500, depending on the model, with higher wattage options available.
And if you want something more stylish and premium, you can look at brands like Chihiros, Twinstar or ADA.
For this tank size, Chihiros and Twinstar can cost around ₹5,000–₹8,000, while some ADA lights can go much higher, even around ₹42,000.
But honestly, don’t waste that kind of money on your first tank.
ADA is an amazing company and has played an important role in the planted aquarium hobby, but planted aquariums existed even before ADA.
Now you will hear terms like high PAR, full spectrum when you start researching planted aquarium lights. These are useful terms, but don’t get too technical at the beginning.
Otherwise, you will end up buying a Chihiros or Twinstar light and spending ₹ 5,000–8,000 on your first aquarium when you don’t really need it.
Those lights are excellent, but they are more useful when you start building high-tech tanks with CO2, better fertilizers and more demanding plants.
About WRGB Lights
You may also hear the term WRGB.
It means the light has a combination of White, Red, Green and Blue LEDs.
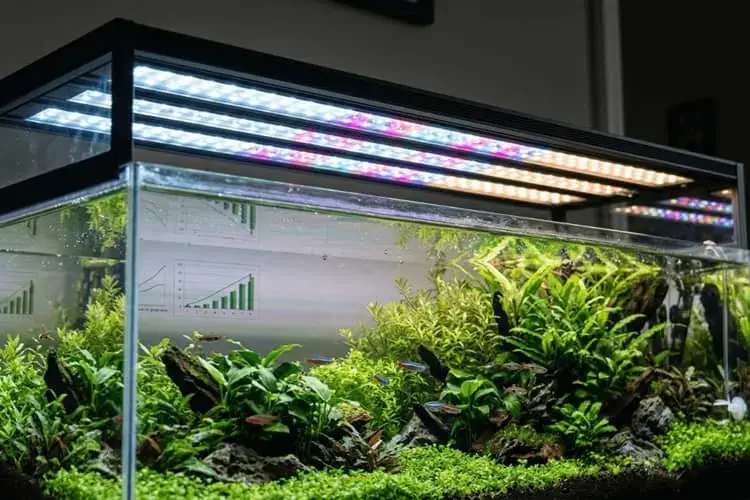
WRGB lights can make planted tanks and fish colours look much better compared with a basic white LED.
For example, there are some reasonably priced Indian-made WRGB lights.
I personally bought a Fireglow 50W WRGB for my first 18 inch tank. It cost me around ₹2,500.
But if I had the same knowledge that I have today, I would still go with the SOBO AL-COB for my first tank.
So, for your first 18-inch planted aquarium, I would give you two simple options:
Option 1: SOBO AL-COB — cheaper and sufficient for a low-tech tank.
Option 2: Fireglow 50W WRGB — if you want something more stylish with better colour rendering.
Don’t overcomplicate the lighting in your first planted aquarium. Start simple, learn the hobby, and upgrade later when you actually need it.
7. Aquarium Filter
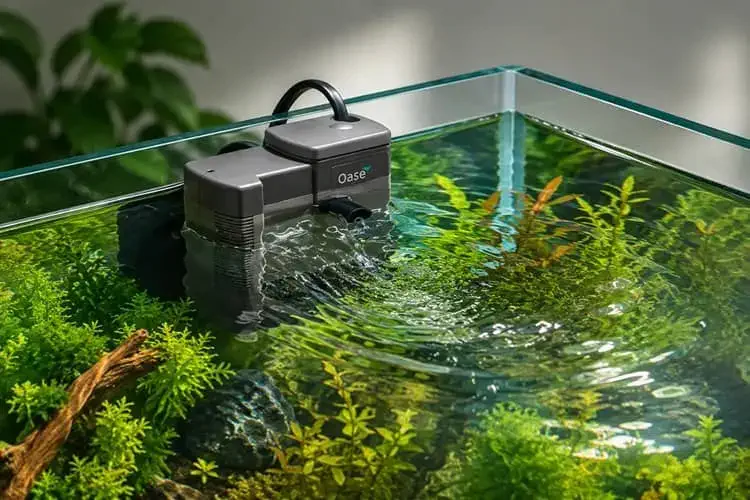
Aquarium filters are actually more important for the fish that you are going to add to your tank, in 3-4 weeks or later.
If your plan is only to grow plants, a filter doesn’t do much apart from creating water movement, which is helpful but not 100% required.
That’s why, in the planted aquarium hobby, you will see many people saying, “I don’t need a filter in my planted tank.”
And technically, they are right.
But when we talk about India, especially Jaipur, where summer room temperatures can go up to 35°C or even more, I would suggest using a filter.
If your tank temperature never goes above 20–25°C, you may be able to skip a filter, as you will see in some planted aquarium channels like Peace of Nature. Just subscribe to the channel; you will love it.
What Filter Should You Buy?
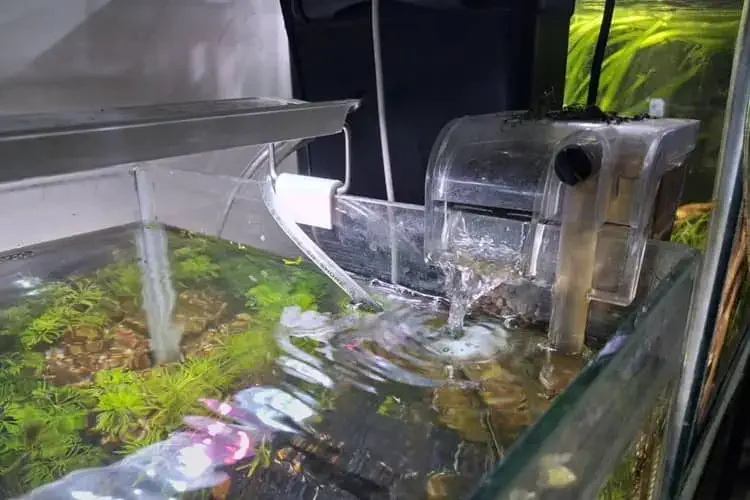
For your 18 × 12 × 15-inch tank, I would suggest a small Hang-On-Back (HOB) filter, as shared one. Its in my 1 feet cube Female Betta Tank.
Brands like SunSun/ SOBO have small HOB filters that are suitable for this size.
You can also use a small sponge filter, which cost like ₹ 300-400 but personally, I would go with a small HOB filter.
I personally suggest buying a HOB filter where the motor is inside the water, rather than the motor sitting outside at the back.
What Should You Put Inside the Filter?
So in a Hang-on back filter, you will add:
- Fine aquarium sponge
- A small amount of bio-media
What Is Bio-Media?
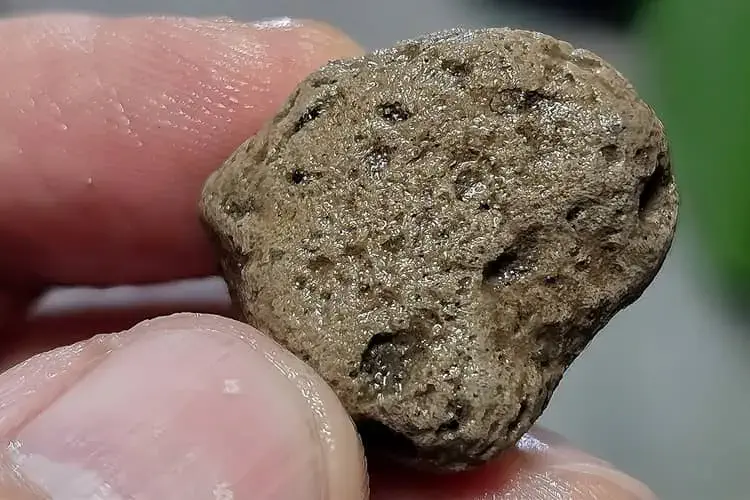
Bio-media are highly porous stones used in aquarium filters. They have thousands of microscopic spaces where beneficial bacteria can form colonies.
These bacteria help improve water quality and make the aquarium safer for your fish.
Don’t worry about the technical details right now. I will create a separate blog explaining aquarium filters, beneficial bacteria, and how biological filtration works.
But in simple words, adding some good bio-media to your filter is much better for long-term water quality and fish health than running the tank without biological filtration.
Canister Filters
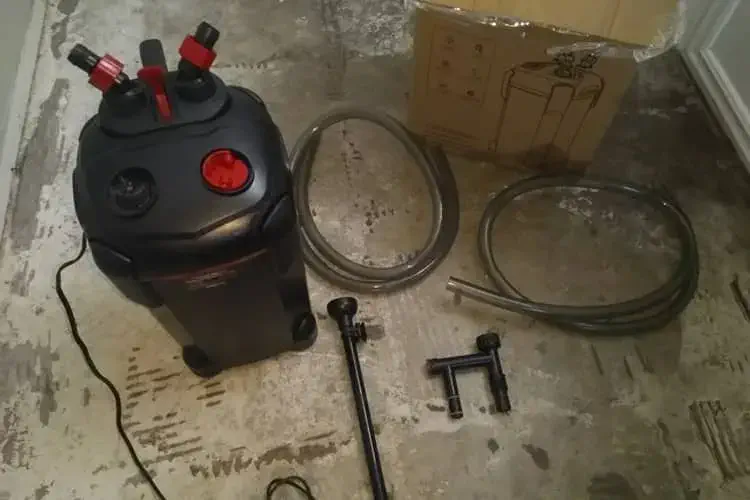
There are also canister filters, and they are excellent. But for your first 18-inch tank, you don’t need one.
Canister filters are generally more useful when you move to larger aquariums, such as 2-foot, 3-foot, 4-foot or larger tanks.
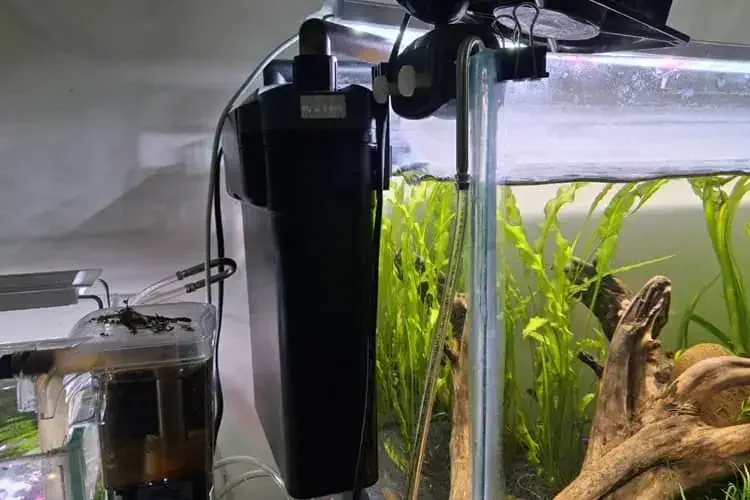
Plus you can also get a cheaper Canister style filter if you search “Canister Style HOB filter” for Rs 1750 – 2500, like the I I am suing in mu 2.5 feet tank. image below.
8. Aquarium heater
Even Jaipur has winters. In December, January and February, the room temperature can sometimes drop to around 13–15°C.
At this temperature, a lot of low-tech aquarium plants also struggle to grow, and sometimes they can even die if the aquarium temperature goes below 18°C.
And yes, this much cold water is not good for most tropical aquarium fish either.
There are some fish which can easily survive in temperatures from around 12°C to 28°C, like White Cloud Mountain Minnows.
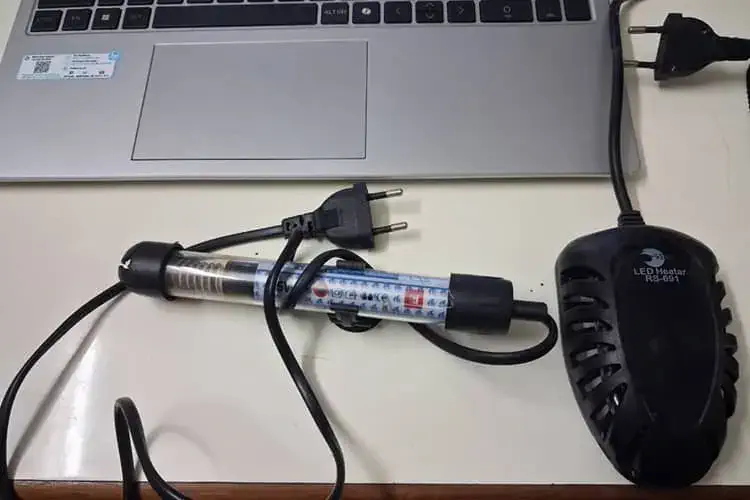
But since this blog is mainly about planted aquariums, I would suggest you simply buy a small 50-watt aquarium heater for your 18x12x15 inch, 45-50 liter tank.
Why 50 Watts?
Now, why 50 watts? Why not 25 watts or 100 watts?
There are different theories about how much wattage you should use for an aquarium heater.
Some planted tank experts suggest using a much higher wattage heater. For example, for a 50 litre tank, some recommend a 200-watt heater.
But personally, for this 18 × 12 × 15-inch tank, I would go with a 50-watt heater.
The important thing to understand is that aquarium heaters have a thermostat.
So, if you set your heater to 25°C, once the aquarium reaches 25°C, the heater automatically switches off.
When the temperature drops, it switches on again. It does not continuously run 24/7.
Cover the Aquarium to maintain heat in the aquarium
Some people suggest covering the aquarium because it reduces heat loss. If your aquarium is covered, the water will lose heat more slowly, and the heater will not need to work as much.
If the aquarium is completely open, the heater may need to run more frequently. I personally don’t cover my tanks, but that doesn’t mean you can’t.
You can use a custom-made aquarium lid, a glass piece, or an acrylic sheet. It’s completely up to you.
How Much Does a Heater Cost?
A basic 50 watt aquarium heater from Sobo/ RS can cost around ₹ 250–400. Most cheaper heaters have a glass body, so they are fragile.
But once you install the heater inside the aquarium and don’t keep touching or moving it unnecessarily, it can easily work for 2–3 years.
If you want to spend more, there are also high-end heaters.
I personally bought a premium 50 watt heater of Aquael for my 1st 18x12x12 inch tank. It cost me around ₹ 2,500–2,800, and it has been with me for around two years and is still working perfectly.
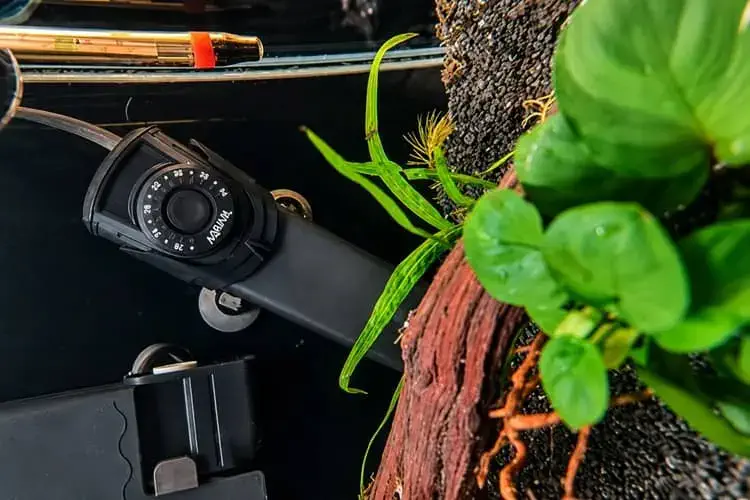
So, for your first 18 inch planted aquarium, you don’t need an expensive heater.
A simple 50-watt thermostat-controlled aquarium heater is enough to keep your plants and future fish comfortable during the Jaipur winter.
9. Water Change
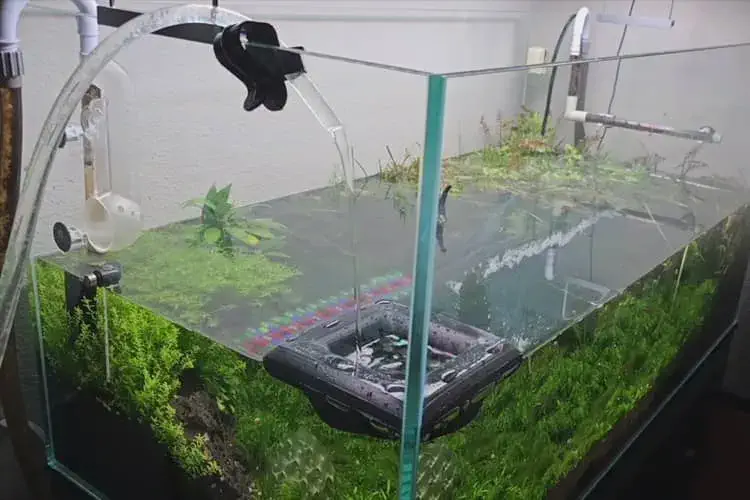
I believe it’s a good habit to make something like a 10%, 20%, or 30% water change weekly. So, in your 18 x 12 x 15-inch tank, as I told you, the water volume will be somewhere around 45 to 50 liters. So, it’s a good thing if you can change a minimum of 10 to 15 liters of water every week.
Now, what type of water should you use?
The first one is municipality tap water. So, in Jaipur, the municipality tap water TDS is around 250. A lot of my friends just take that water and either keep it for 4–5 days in the open or use a product called anti-chlorine liquid.
Because municipality water has chlorine or chloramine, which cannot harm your plants but can be deadly for your fish. So, for 15 liters, you have to add, like, I don’t know, 1 to 2 ml. It’s a cheap product. I currently use Aquanature Anti-Chlorine. You can get it on Amazon or from their website.
The next water option is borewell water. So, in Jaipur, borewell water is very high in TDS, and in some places, it is even above 1,000. So, it is strictly not good. But if you live in a place where your groundwater TDS is below 400, you can use that. But just make sure, if possible, to check the nitrate level in the water.
Now, what is nitrate? Nitrate is a byproduct of, let’s say, some leaves or plant parts melting and decomposing. In the future, you will add fish, and fish will poop. So, their poop gets dissolved in the water and creates ammonia, which is then converted into nitrites, and then it is converted into nitrate.
So, ammonia and nitrites, even at any level, can be harmful to fish. Nitrate can be a bit less harmful, but we still want it to be under 40-50 ppm.
But don’t worry too much about how to calculate that. Just make sure that you either use your municipality water with an anti-chlorine product. And I personally use RO water, which is the third option here.
Because RO water removes the TDS level by up to 95%. So, let’s say in my area, where I live, we get borewell water with around 1,200 TDS, and RO water brings it down to around 60 TDS.
Another advantage of RO is that it also removes chlorine or chloramine, so there is no need to add any anti-chlorine liquid. But as my mind says so, I personally add it because I don’t want to risk my fish.
With RO water, you also need to add two things.
One is, like, 5 grams of baking soda in 50 litres of water, because RO water hardness is almost zero, and we don’t want that because it can lower the pH, which is again technical stuff related to water chemistry for aquariums. A separate blog on this will be available soon.
Along with baking soda, I also use a product called GH Enhancer.
GH means General Hardness, or, in simple terms, minerals in water. Like, we need some sort of calcium, magnesium, and other trace elements in water, which are good for plants and also fish health. Not all fish, but especially fish like livebearers, like the guppy and platy fish.
So, how do you raise the GH in your water? You can either search online for products needed to enhance GH in an aquarium, and there are a lot of products available. I personally use a product called Seachem Equilibrium.
And I add, again, something like 1 gram per 10 liters. The company might suggest adding a bit extra, but I think 1 gram per 10 liters has been working fine for me for the last two years.
So, the main concept of this point is: make a habit that, in a 50-liter tank, you change at least 10 liters of water a week. It’s not very expensive. If you’re using municipal water, you are just adding anti-chlorine, which is a very cheap product.
If you are using RO water, you just need to add some baking soda, which is again super cheap. And even Seachem Equilibrium, if you buy, let’s say, 200 grams, it will work for around 20,000 liters of water. So again, this product will be handy for years to come.
10. Total Planted Tank Setup Cost in 2026
- Glass Aquarium of 18 Length x 12 width x 15 height (inches) = Rs 1000-1200
- Thermocol as aquarium base = Rs 50
- Substrate = Rs 450 (Dirted tank with sand capping)
- Hardscape = Zero to Rs 300
- Aquarium Plants = Rs 300-400 (with shipping cost)
- Aquarium Light = Rs 750 (Sobo AL Cob 40-50 cm) or Rs 2500 (Fire glow 50 watt WRGB)
- Aquarium Filter = Rs 550-600 (Sobo/ Sunsun HOB with motor inside water)
- Aquarium heater = Rs 250 (50 wall glass heater of Sobo/ RS)
A total of Rs 3650-4100 with Sobo AL Cob Light and Rs 5400-5800 with Fireglow 50 watt WRGB light.
Sir very nice information 🔥
thanks for the article and sharing your experiences
Nice info